Setting Up Remote Data Stores
You can set up or manage your remote data store settings from your Remote Data Store page in the Administration group. For more information on the Remote Data Store page, refer to the Remote Data Store Page topic.
To access your Remote Data Store page, select Remote Data Stores from the Settings group, as shown in the figure below.
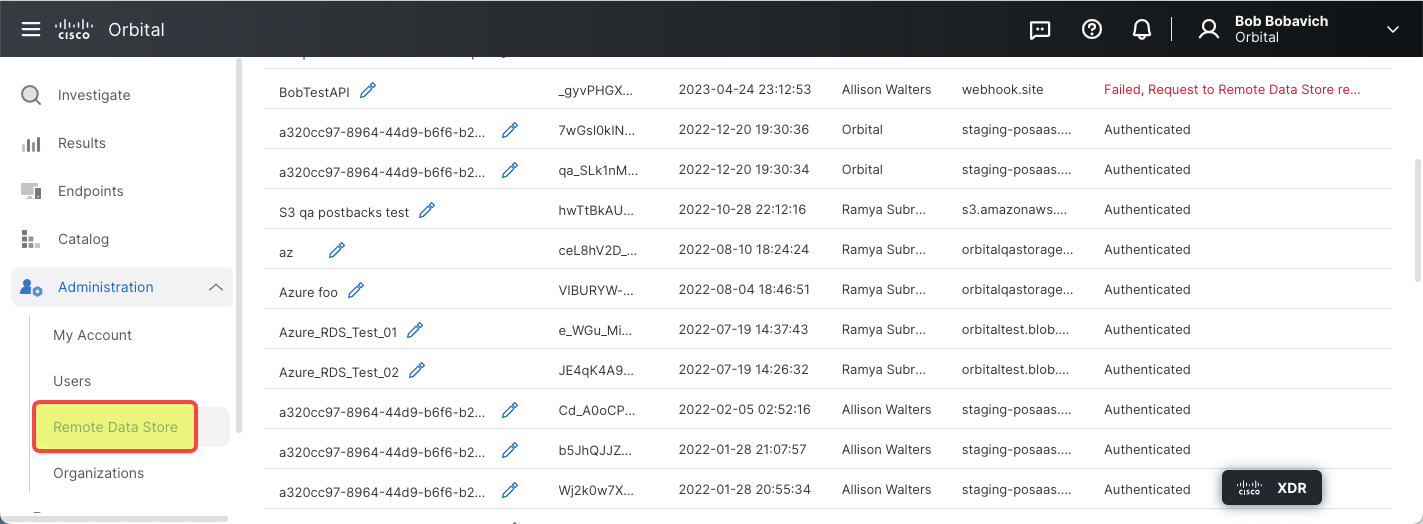
| Note: | Orbital will not send results that are over 250 Megabytes in size to a remote data store. |
Adding a Remote Data Store
Orbital allows you to define a new remote data store that can then be used to store the results of your queries. To add a new remote data store:
-
Click Add Remote Data Stores, as shown in the figure below.
-
Type the necessary information into the popup's fields.
-
Click Save. The data store is added to the list, and may now be selected as a destination for results when scheduling a query.

The Add Remote Data Store popup opens, as shown in the figure below.
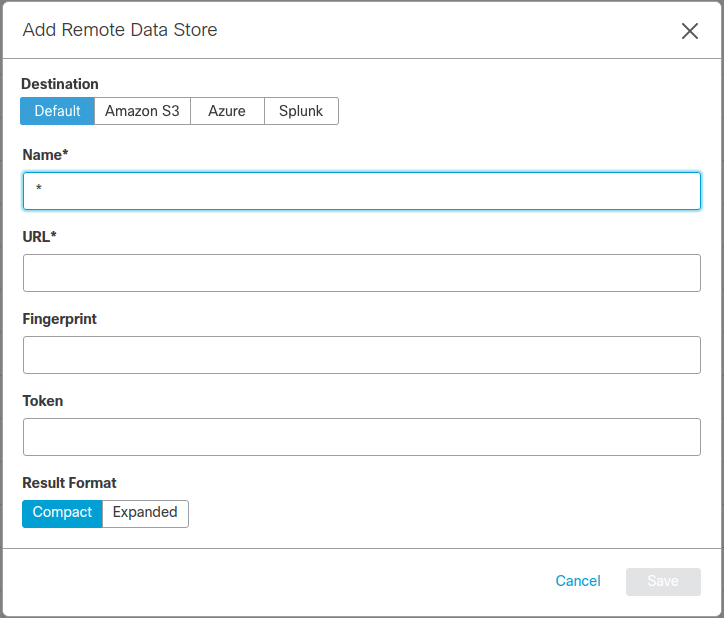
| Note: | The Destination, Name, and URL fields must have information entered into them. |
Editing a Remote Data Store
There may be times when you will need to edit a remote data store's definition. To edit an existing remote data store:
-
Navigate to the remote data store listing that you will edit.
-
Click Edit ( the pencil icon
 ) to the right of the remote data store's name.
 -
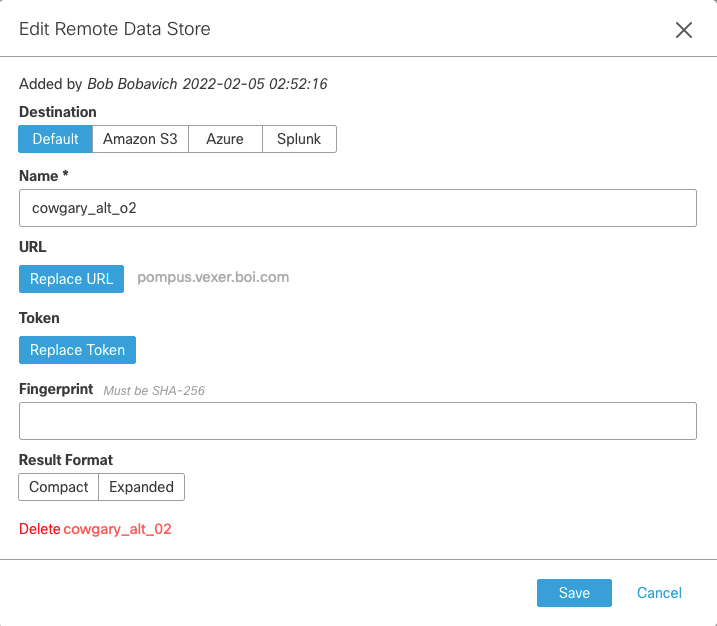
Modify the desired values in the Edit Remote Data Store popup's fields in accordance with the field definitions above.
-
Click Save. The modified data store information is saved to the data store's definition.
This will display the Edit Remote Data Store popup, as shown in the figure below.
Deleting a Remote Data Store
There will be times that you will need to delete remote data store definitions. This could be due to a remote data store service no longer being available or no longer conforming to necessary requirements. To delete an existing remote data store:
-
Navigate to the remote data store listing that you will edit.
-
Click Edit ( the pencil icon
 ) to the right of the remote data store's name.
 -
Navigate to the Delete prompt at the bottom of the popup, as shown in the figure below.
-
Click the Delete [Remote Data Store Name] button. This will remove the remote data store definition from Orbital and refresh the remote data store list.
This will display the Edit Remote Data Store popup, as shown in the figure below.


This will display the Delete Confirmation Prompt, as shown in the figure below.

Setting the Default Remote Data Store for Your Profile
Orbital allows you to set one or more of the defined remote data stores as the default data store or stores for your profile. This data store will then populate the Remote Data Store dropdown in the Schedule Orbital Query popup. To set the default remote data store for your profile:
-
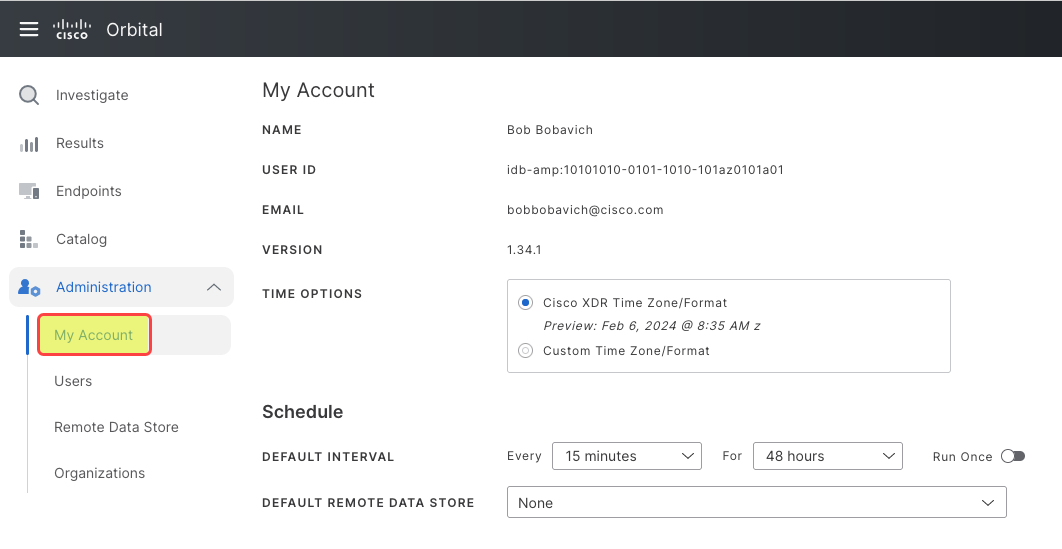
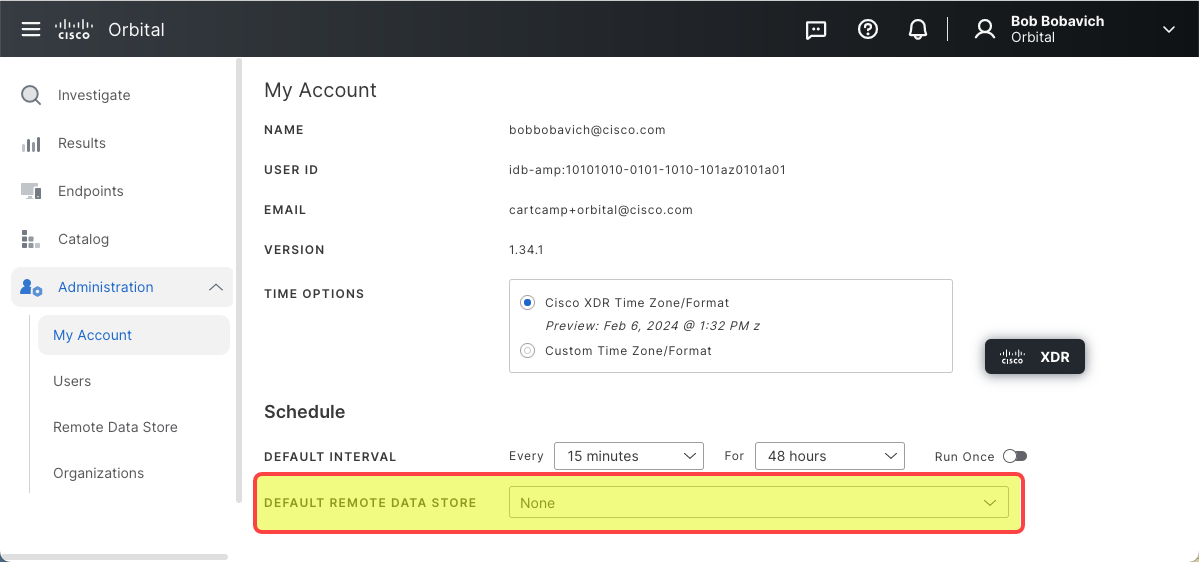
Select the My Account page from the Administration group, as shown in the figure below.
-
Navigate to the Default Remote Data Store dropdown, shown in the figure below.
-
Click the dropdown.
-
Navigate to the desired remote data store.
-
Click the desired remote data store.
Setting Multiple Default Remote Data Stores
If you wish to set multiple remote data stores as you default data stores:
-
Click the Default Remote Data Store dropdown to expand it.
-
Navigate to the desired remote data store listing.
-
Select the desired remote data store so that it is displayed in the Remote Data Store dropdown's field.
-
Expand the Default Remote Data Store dropdown again.
-
Navigate to the next desired remote data store listing and select it.
-
Repeat until you have selected all of the required remote data stores.
| Note: | In order to delete a remote data store listing, click on the X beside the data store's name |
Obtaining a SHA-256 Fingerprint
If the remote data store is self-signed, you will need to obtain a SHA-256 fingerprint. Depending on the web browser that you use, the procedure for obtaining the fingerprint will differ. As an example, if you use Firefox, the procedure could be as follows:
-
Open your browser.
-
Navigate to the remote data store's service site.
-
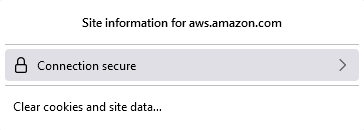
Click the lock icon, shown in the figure below, located to the left of the URL.
-
Click Connection secure, shown in the figure below.
-
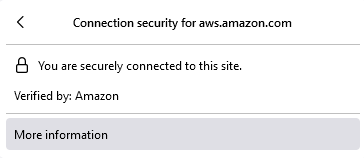
Click More information, shown in the figure below.
-
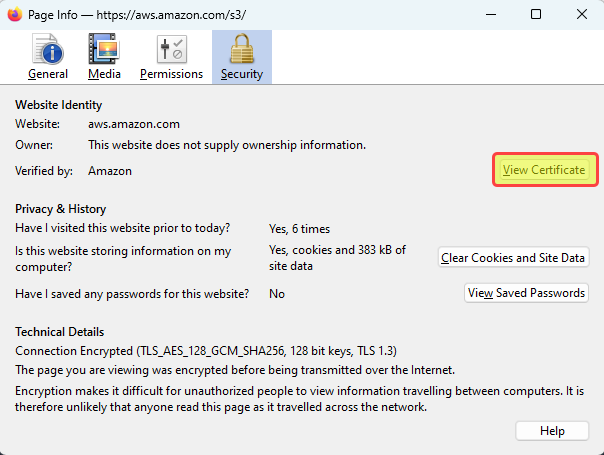
Click View Certificate, as shown in the figure below.
-
Scroll down to the Fingerprints section of the Certificate page.
-
Copy the fingerprint text from the SHA-256 section.
This string is what you will paste into the Fingerprint field of the Add/Edit Remote Data Store dialog.
![]()
You can also obtain the necessary fingerprint using the command shown below.
| > openssl x509 -noout -fingerprint -sha256 -inform pem -in <filename>.crt |
Please contact your host administrator if you have questions about certificates and fingerprints.